food banner

food banner
Showing posts with label baking. Show all posts

Sunday, 6 November 2016

Quick Pizza

I love pizza, it's delicious and great for sharing with friends, but real pizza takes time and planning.

My quick pizza is different - it's ready in 20 minutes!

Heretically I use self-raising flour instead of yeast. It doesn't have the rich yeasty flavour and texture of traditional pizza, but it's thin, crispy and when loaded with toppings it's hard to tell the difference.

My recipe is so simple:
  • 4 heaped tablespoons self-raising flour
  • Half teaspoon of salt
  • 1 tbsp olive oil
  • Water
  1. Mix in a bowl with enough water to bring together into a non-sticky dough.
  2. Cut in half to make two small pizzas, or leave for one very large pizza.
  3. Roll out the dough until it's as thin as you want, and big enough to fill the bottom of a frying pan.
  4. Take a large non-stick frying pan and get it hot on a high heat.
  5. Transfer the dough disc and cook for 3-4 minutes until the bottom is slightly browned and crisp. Repeat for the second pizza.
  6. Add your toppings, place on a baking tray then cook under a hot grill or hot 200C oven for ten minutes. Enjoy with a side salad, it's so easy!

Topping ideas

Pear and Stilton White Pizza

White pizzas are often neglected but this is so delicious for autumn. Spread some Greek yoghurt thinly on the pizza base, then top with slices of firm pear, chunks of Stilton and chopped fresh chilli. Chopped walnuts are also a great addition.


Mushroom and Tomato Pizza

Classic but delicious: smear the base with a rich tomato sauce, oregano, sliced mushrooms and mozarella.


Sunday, 8 February 2015

Sweet Potato Muffins

I had some sweet potatoes that needed using up so, I totally winged this recipe and I'm amazed how they turned out! I've never had much luck with muffins recipes, but these turned out light, fluffy and delicious! They're accidentally vegan, if only because I didn't have any butter or eggs so I used vegetable oil and tofu! Tofu, in a cake you say? Madness! But they turned out great, you'd never know!


Makes 10
  • 250 g sweet potato, finely grated
  • 250 g self raising flour
  • 2 tbsp rye flour (or wholemeal, optional)
  • 120 ml vegetable oil
  • 100 g tofu, mashed
  • 50 g golden raisins or sultanas
  • 170 g sugar
  • 2 tsp mixed spice
  • 1 tsp ground ginger
  1. Mix everything up in a big bowl to a smooth consistency.
  2. Preheat your oven to 190C.
  3. Spoon into muffin cases (I use silicone ones, much easier). The mixture should come to the top of the casing so it bulges outward in the classic muffin-top shape.
  4. Pop into the hot oven for 25-30 minutes.
  5. Leave to cool, pop on the kettle, and enjoy!

Variations

For that extra bit of indulgence and style give them a cream cheese icing, like a carrot cake. They're quite delicious by themselves.

Orange zest would also be a good touch, I didn't have any! For a nutty crunch add a handful of chopped walnuts, pecans or sunflower seeds.

Wednesday, 24 December 2014

Mincemeat and Marzipan Festive Crown

Ah Christmas, how we love you - and how fat you make us. But in this case it was worth it! This recipe combines sweet zesty fruit with crisp pastry and crunchy nuts, far superior to stodgy stolen in my opinion!

This is my take on tv baker Paul Hollywood's Christmas Couronne, or crown (here for the recipe). It's a yeasted dough, rolled out flat and layered with orange marzipan and my home-made mincemeat, rolled up and then twisted into shape. Once baked I topped it with almonds, cherries and water icing with a hint of orange flower water. Delicious.

After icing

Five minutes later...


Thursday, 18 December 2014

White Chocolate Mince Pie Croquembouche

I wanted to make an attractive and tasty centrepiece for my party so I set myself a change: the dreaded Croqembouche, a tower of profiteroles filled with a mincemeat cream, held together with crunchy caramel and drizzled with white chocolate.

It consists of several scary things I've never done before: choux pastry, caramel, creme patisserie, and using a piping bag! I've always been a bit terrified of all four but gave it a go!


Choux pastry

I remember once watching tv cook Lorraine Pascal, who I otherwise love, talking about how choux was allegely "the easiest pastry"! Having done it now I suppose that's true: you don't have all that cutting and roll, but you do need a strong arm for mixing and constructing anything from it is very fiddly.
Choux involves boiling up milk, adding flour, then slowly stirring in eggs to a smooth paste. It's slightly hard work but quite easy. I recommend fellow amateur baker and Great British Bakeoff alumnus Ruth Clemens' choux recipe, it's easy to follow and gave exactly the quantity I wanted, which was about 70 smallish profiteroles. I made them a couple of days before.

Creme patisserie

"Creme pat" is basically egg custard with some added flour, There are so many creme patisserie recipes around it was hard to know which to use! I made mine slightly thicker than usual, then mixed with some leftover mincemeat which I'd blitzed to a paste.

Piping... I've never piped before and that was probably the worst part. Getting a creamy mixture into profiteroles without them bursting or being underfilled was a real pain. I guess it just takes practice!

Caramel

Caramel always scared me because I've seen horror stories of people burning it, burning themselves, and making a terrible mess of their surfaces! I followed some good advice from a trusty old book: use a sugar thermometer to raise the temperature to 154C rather than doing it by eye, and wear rubber gloves so you don't burn yourself!

Assembly

The caramel is used to weld the profiteroles together into a pile - the trick is using enough caramel so they stick together, but not too much so they're impossible for your guests to pick apart! As a rookie I used too much, particularly the ones at the bottom (when I was just starting), so they had to be chipped apart with a knife!

A great trick I saw on Youtube was making spun sugar using two forks. I have to say spun sugar really does look beautiful with its golden hairlike strands. Dip two forks into the caramel, stick them together by the profiterole pile then pull them apart, forming fine hairs you wrap around as decoration. I'll definitely use that trick again.

Finally I briefly zapped some white chocolate in the microwave, left it to melt, then drizzled it over the pile. Piping would've been prettier but after 70 profiteroles I was sick of piping by that point!

Saturday, 7 June 2014

Summer teatime: Plum jam & Scones

The downside of loving food is eating too much of it! I've been on a diet lately hence not posting in a while.

Today I had a basket of juicy black plums. To be honest I'm not keen on eating plums, but I love plum jam. And what's the best use for plum jam? Scones! A perfect teatime treat for a summer's day.

I was always rather afraid of jam making, it always seemed mysterious and complicated. But once I started, I discovered how easy it is once you summon up the courage.

My tips are, get a sugar thermometer, and make sure you keep stirring so it doesn't burn on the bottom! Jam tends to bubble and splash when cooking, so I recommend using a large pan that's only a third full to minimise mess. Rubber gloves also protect your hands from sugar splashes!

Plum Jam

Jam uses roughly equal amounts of fruit and sugar. I always try to use less sugar (say 60/40), but it just makes it trickier to set.

  • 750g plums, chopped and stoned
  • 750g sugar
  • 1 small apple, peeled and chopped
  • Juice of half a lemon
  • 100 ml water
  1. Add the fruit, juice and water to a pan, bring to the boil and simmer for half an hour or so until the fruit is cooked.
  2. Take off the heat, and stir in the sugar until it dissolves.
  3. Return to the heat and crank up to maximum. I have a sugar thermometer which hangs on the side of my pan so you can always see the temperature.
  4. Stir gently every so often so that it doesn't stick to the bottom.
  5. Keep checking the temperature. When it rises to 104C, that's the "setting point" at which it turns into jam.
  6. To test whether it's set, the traditional method is to put a couple of saucers into the freezer. Drop a small dribble onto a cold plate and poke it with your finger. If it "wrinkles" or just feels jelly-like, it's set. If it stays runny, you need to cook for longer.
  7. Once it's reached setting point, take off the heat. Leave to cool for a few minutes. It will thicken as it cools so don't worry if it still seems runny, but if it's very thick while it's still hot, you might want to add a splash of water from the kettle.
  8. Pour into sterilised jam jars. I always label my jars so I remember what they are and when I made them!

Scones

Scones are one of my store-cupboard staples. If I was a glamorous housewife I could claim I only make them when unexpected guests pop by, but the truth is I make them for myself because they're so quick! I tend to leave out butter but add 50g for more indulgent scones. Serve them with butter and/or clotted cream for full-fat luxury, or just with greek yoghurt for those watching their waistline!

  • 225g self raising flour 
  • (or, 225g plain flour plus 1.5 tsp baking powder)
  • 150 milk
  • Pinch of salt
  • 1 tsp sugar
  • Handful of dried fruit (optional)
  1. Mix it all together in a bowl.
  2. Bring together into dough, you just want to mix it so everything is incorporate into a ball.
  3. Preheat your oven to 220C.
  4. Transfer to a floured surface, and roll so that it's an inch or more thick.
  5. I'm greedy and like big scones so I use a large pastry cutter to make 4 scones. A smaller one should make 6, or 8 for bite-sized ones.
  6. Punch the cutter straight down, trying not to twist the sides.
  7. Pop each one onto a baking tray. You can leave them plain or glaze with milk.
  8. Whack into the hot oven and cook for 15 mins.

Tuesday, 15 April 2014

Custard Tarts

When life gives you leftover eggs and pastry, make custard tarts! After my pie-making session the other day I had some scraps of pastry and most of a beaten egg left over. Whenever you make pastry there are always trimmings, so this is a great way of using it up that I'll definitely use again.


I mixed an equal amount of plain yoghurt with the egg, plus a couple of tablespoons of sugar. I roughly rolled out the leftover pastry and used it to line two silicon muffin cases, poured in the egg mixture, and sprinkled it all with nutmeg. Since the pies were still cooking in the oven I put the tarts in at 200C for the last 15 minutes of baking. A great unexpected treat!

I actually left these in slightly too long since I was busy, take custard tarts out when they're still quite wobbly as they carry on cooking even when out of the oven. Normally you'd use cream but I had yoghurt handy, it gives them a slightly grainy, cheesecakey texture.

Even so, they were yummy, and I ate them both!

Sunday, 13 April 2014

Pies pies pies!

On a Sunday I often hanker for something really English and old-fashioned, like my gran used to make. Something wholesome with cabbage and potatoes. It's not fancy, it's not trendy, but what can be more English than a pie?

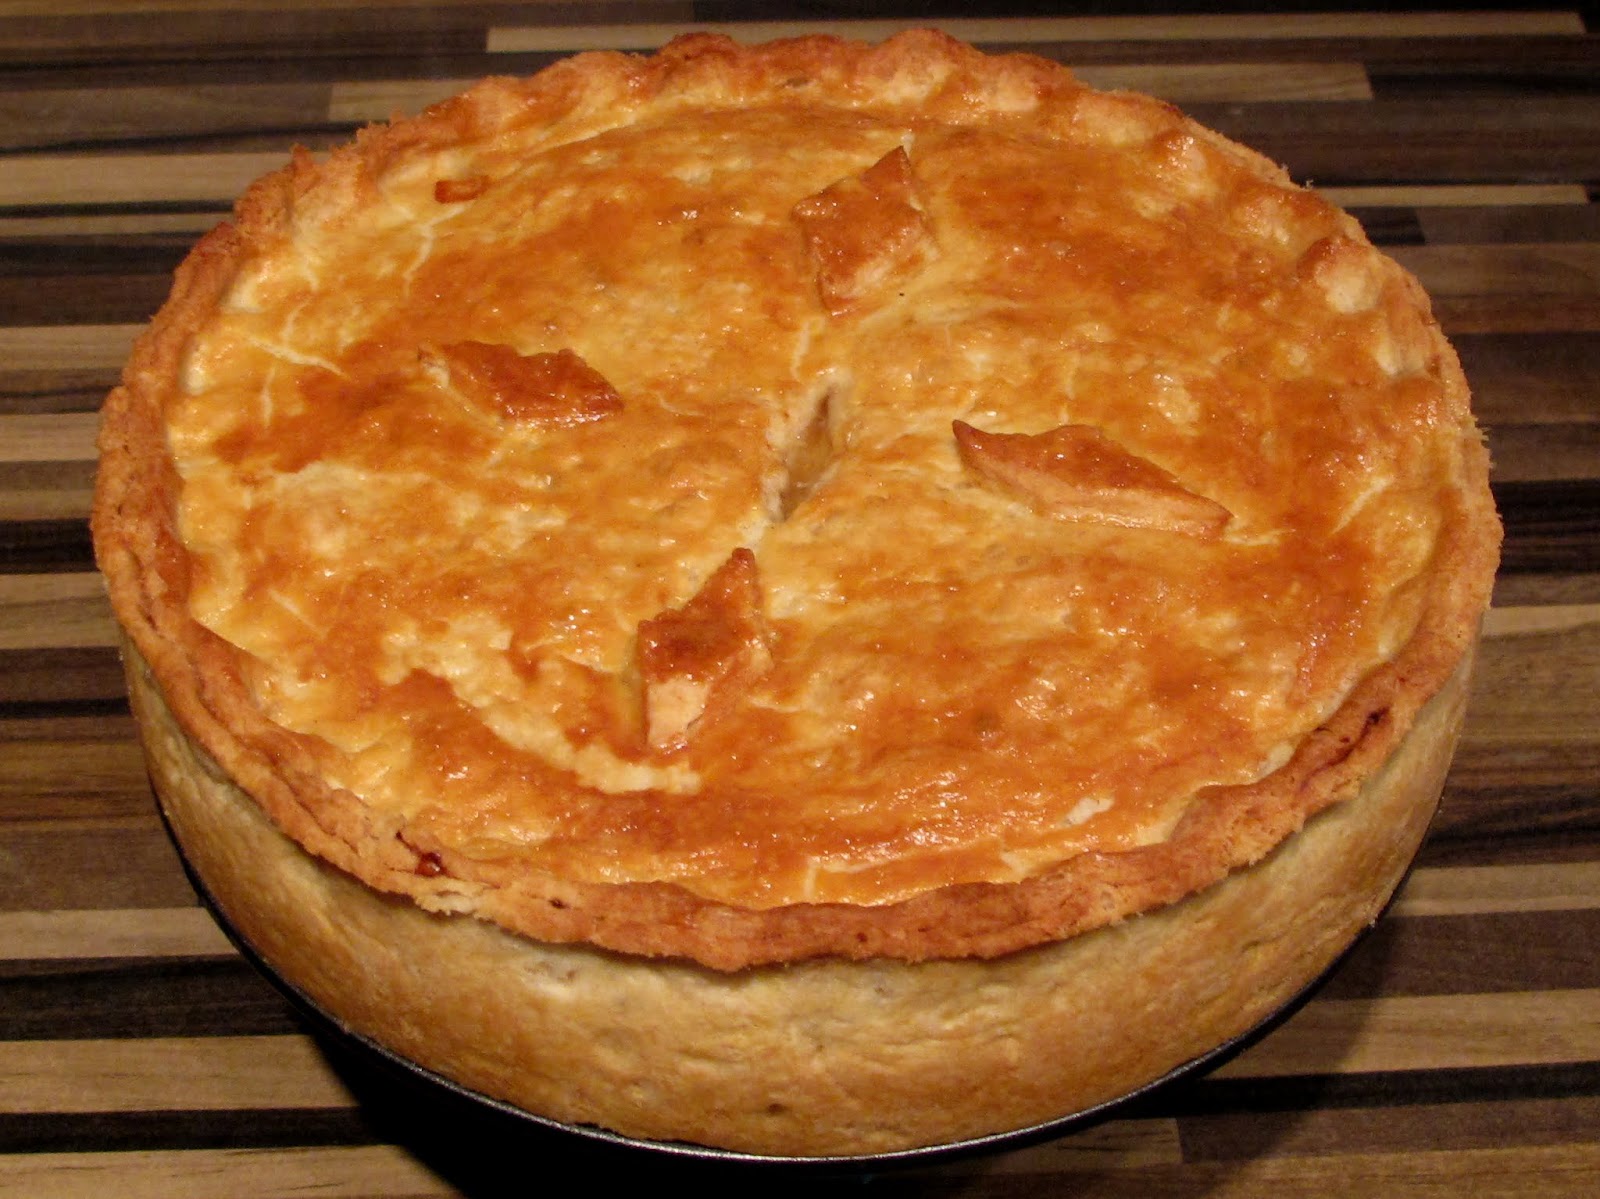
This savoury pie uses a quick and easy pastry that takes me right back to my childhood: suet crust. It's quick enough to have it ready on the table in under an hour. There's no messy rubbing in, just mix it up, roll out and go. Today I'll show you two great pie fillings: Quorn Chicken and Mushroom Pie and a Fake Duck and Ale Pie.

For my meat-eating readers, these recipes work great with meat too!


Suet Crust Pastry

This makes just the right quantity for my 8-inch pie tin.

  • 200g self raising flour
  • ½ tsp salt
  • 100g vegetable suet
  • or: 50g vegetable suet, 50g frozen butter, grated
  • 5-6 tbsps very cold water
  1. Put the flour and salt in a large bowl. Tip the suet into the flour and stir. If using butter, freeze your block of butter and grate it straight into the dry flour.
  2. Spoon 5 tbsps cold water into the mixture and mix with a fork until it forms into a uniform lump. Add another tbsp if it's still dry.
  3. Remove from the ball and gently form it into a smooth ball, making sure all the flour is incorporated.
  4. You can use it straight away, or wrap and leave for ten minutes in the fridge while you work on the pie filling.

Quorn Chicken and Mushroom Pie Filling

For chicken-type recipes I often use my fingers to shred up a Quorn roast, it's more chunky and substantial than fillets or pieces, and also slightly cheaper by weight. The tarragon and yoghurt make this tasty and tangy so it's good eaten cold as well as hot.


  • 200 g Quorn (roughly shredded Quorn Roast, chopped fillets)
  • 250 g mushrooms, thickly sliced
  • 1 onion, finely chopped
  • 1 large celery stick, finely chopped
  • 1 tbsp vegetable oil
  • 2 tsp dried tarragon (or a few chopped fresh leaves)
  • 1 clove garlic, crushed
  • Slosh of white vermouth or white wine (roughly a small glass)
  • 1 tsp Swiss Marigold stock powder
  • 4 heaped tbsp thick set yoghurt
  1. Heat the oil in a pan on a medium heat. Gently fry the onion and celery til the onion loses its pungency
  2. Add the mushrooms and stir until they're slightly browned and start releasing their juices.
  3. Add the crushed garlic and stir for a minute.
  4. Sprinkle in the stock powder and tarragon, then pour in the wine. 
  5. Stir thoroughly to deglaze the pan and let it reduce for a few minutes.
  6. Take off the heat and leave to a little, then stir in the yoghurt.
  7. Season with salt and pepper.
  8. Taste the mixture - if your yoghurt is particularly sour it might need a sprinkling of sugar just to balance the flavour.

Variation

Tarragon adds an original note to this pie, it's a classic combination with chicken type recipes. If you're not keen on tarragon, thyme is also great; lemon thyme is even better if you can get it.

For more luxury use double cream instead of yoghurt! For a more saucey pie make a small amount of white sauce. This is great but just takes more time, I'm all for quick and simple recipes but sometimes it's worth it.


Fake Duck and Ale Pie

There are all kinds of beefy meat alternatives available but since I discovered mock duck in a can in my local Asian supermarket, I absolutely love it. It's made with seitan, a surprisingly savoury and meaty form of wheat gluten.

  • 1 can of mock duck (approx 250g shredded seitan)
  • 200g button mushrooms, sliced
  • 1 onion
  • 1 large carrot
  • 1 large stick celery
  • 1 bay leaf
  • 1 heaped tsp Marmite (optional)
  • ½ pint dark brown ale
  • 1 tsp plain flour
  1. If using canned seitan, drain off the liquid and dry the seitan on a tea towel. If it's in large pieces, shred it with your fingers into bite-sized chunks.
  2. Dice the onion, carrot and celery.
  3. Heat 1 tbsp of oil in a pan on a moderate to high heat and fry the seitan until it starts to brown.
  4. Add the vegetables and cook off the onions til slightly translucent.
  5. Add the mushrooms and cook for a few minutes.
  6. Sprinkle in the flour and stir til everything is coat, then add the brown ale and spoonful of Marmite.
  7. Mix thoroughly and reduce on a gentle heat until the sauce becomes thick and savoury.
  8. Season with salt and pepper. If the beer and Marmite leave it tasting a little bit sharp, soften with half a tsp of sugar.

Variations

Use whatever kind of ale you like, but the darker and richer the ale, the tastier the pie will be. I didn't use herbs this time but thyme is a good addition.


Filling and baking your pie

I generally use an 8" loose-bottomed sandwich tin for my pies.

  1. Preheat your oven to 200C and leave your pie filling to cool.
  2. Retrieve your pastry from the fridge and cut off roughly a third of it to save for the top.
  3. Sprinkle flour on your surface and roll out the pastry into a circle wide enough to cover the bottom and sides of your tin, plus a little bit more.
  4. When rolled out, sprinkle with flour. Gently fold the pastry in half, then fold it in half again into a pie-wedge shape.
  5. Centre the point of your pie wedge in the middle of your tin, unfold it, then unfold it again. I find this the best way of getting pastry into a tin.
  6. Gently press the pastry into the corners of the tin. Using a spare lump of pastry helps with this.
  7. Roll out the remainder of the pastry for the top, roughly an 8-9" circle.
  8. Spoon your cooled filling into the pie and press down so it has an even surface.
  9. Roll up the pastry top onto your rolling pin, then unroll it onto the top of the pie.
  10. Press the pastry lid down onto the pie. I usually crimp it by pressing my thumb into the pastry but use whatever style you prefer, my gran used a fork!
  11. With a sharp knife, trim off the excess pastry. I do this at a 45 degree angle but the pastry doesn't shrink much so this is mainly cosmetic.
  12. For a shiny finish glaze the top with beaten egg. Pastry trimmings make a nice decoration too.
  13. Cut a hole or cross in the middle to allow steam to escape.
  14. Pop into the middle of your hot oven and bake at 200C for 30 minutes, until well browned.

Eat and enjoy!

Friday, 11 April 2014

Help your 5-a-day with this easy fruit cake

I'll admit it, I've not been great at getting my five a day recently, but there are some surprising things that actually count towards it.

Firstly: beans and pulses. Beans on toast is one of my quick on-the-go shameful secrets, but beans are packed full of beneficial nutrients that make them count as a portion of vegetables. They're stuffed with magnesium, iron and potassium: beans beans really are good for your heart! Even a portion of hummus counts, just don't have it too often as it's full of oil. I have a couple of delicious recipes for Boston Beer-Baked Beans and Healthy Hummus, I'll write them up when I next make a batch.

Also onions. I put onions in almost everything I cook but I hadn't really thought of them as a vegetable counting to my five a day! But they contain many essential nutrients and are even a good source of folic acid, important for pregnant women.

Fruit juice is also one that's obvious but easily overlooked, but one more healthy secret: dried fruit. A handful of dried fruit definitely counts as one serving. And what's the best and most comforting way to eat dried fruit? A slice of fruit cake!

Here's my recipe for a fat free, and if you insist, sugar-free fruit cake that you wouldn't guess is actually good for you.

Tea Fruit Loaf

Fruit cakes have to be moist, which usually means loading them with butter. This simple wartime recipe tea loaf replaces the fat with moisture soaked into the fruit, which means the cake won't last for weeks or months like a traditional cake, but is so delicious it won't need to! The recipe is endlessly variable, I make a different version of it every other week for guests and afternoon snacking.

  • 75g/2¾oz raisins
  • 75g/2¾oz sultanas
  • 75g/2¾oz currants
  • 300ml/½ pint lukewarm tea
  • 250g/9oz self-raising flour
  • 200g/7oz soft light brown sugar
  • 2 tbsp demerara sugar (optional)
  • 1 free-range egg, beaten
  • 1 tsp ground cinnamon
  • 1 tsp grated nutmeg

  1. Put the dried fruit into a large mixing bowl, pour in the tea and stir.
  2. Cover the bowl and leave to soak for eight hours or overnight.
  3. Next day, preheat the oven to 170C/335F.
  4. Add the beaten egg, sugar and spices to the fruit and mix well. One done, add the flour.
  5. Grease or line a 1lb/medium loaf tin. Spoon the mixture into the tin.
  6. Sprinkle the demerara sugar on top, if using.
  7. Transfer to the oven and bake for one and a quarter hours, or until a skewer inserted into the cake comes out clean.
  8. When cooled, store in an airtight container for up to a week.

Serve sliced with a nice cup of tea, and congratulate yourself that since it's fat free, you're entitled to spread it some with good unsalted butter!

Tropical fruit cake


Variations

This recipe is very forgiving so long as you stick to the proportions outlined. You can use 225g of any combination of dried fruits to get different results. Use whatever tea you fancy, I tend to save up whatever is left from my teapot whether it's Earl Grey, Darjeeling or builders tea. Changing the spices also works, I sometimes add two teaspoons of ground ginger instead.

Tropical Fruit Cake: For a light fruit cake, use a combination of chopped apricots, golden raisins and mixed tropical fruits steeped in green tea. Add a teaspoon of almond extract, and top with flaked almonds or dessicated coconut.

Apple tea cake
Apple Tea Cake: Soak only the raisins and sultanas, then add a whole grated eating apple along with the sugar and spices. Peel a second apple and cut it into slices, arranging it on top of the cake with a sprinkling of brown sugar. Once cooked, brush the cake top with a spoonful of hot apricot jam to give a glossy finish.

Sugar-free Tea Cake: Replace the sugar with 80g of stevia powder, or any other sugar substitute suitable for baking.

Wednesday, 2 April 2014

Cheese and onion soda bread rolls

I ran out of bread so quickly knocked up these rolls to go with my soup, they baked while the soup was cooking. If you've never made bread before, soda bread is the easiest way to start, I was quite proud of the results!


Soda bread is pretty forgiving, you just mix it up and go. The proportions are very roughly 2 parts flour to one part liquid, it's quickest to just use cups or whatever measuring implement you have handy, especially if you're in a hurry! Sodabread traditionally uses buttermilk, but who has that hanging about? Milk and yoghurt do just fine.

This makes about four smallish long rolls (obviously I ate one of the above, just to check). Soda bread doesn't last more than a day, so therefore I was entirely justified to gobble one fresh from the oven!


  • 200 g self-raising flour
  • 100 ml milk
  • 1 big tbsp natural yoghurt
  • Sprinkling of salt
  • Smattering of cheddar cheese
  • 1 spring onion


  1. Finely chop the onion.
  2. Plop the yoghurt and salt into the milk and mix.
  3. Preheat the oven to 200C fan (220C or equivalent)
  4. Put the flour and onion in a large bowl and pour in the milk mixture. Stir with a fork until it comes together into a mass.
  5. Transfer to a floured surface, and knead very gently. Essentially all you're doing is making sure it's mixed thoroughly into a not-too-sticky dough, soda bread mustn't be overworked.
  6. With your hands roll it into a sausage about 12"/30cm in length. Cut into four equal portions and flatten to form four rectangular rolls about two fingers thick.
  7. As a decoration I snipped the top of these with scissors at an angle to form triangular points - either do that or just slash across the top.
  8. Top them with some grated cheddar. In the picture I also sprinkled black onion/nigella seeds but in retrospect this is slightly gilding the lilly!
  9. Pop onto a baking tray then into the oven for 15-20 mins. Tap underneath, a hollow sound says they're cooked.

Leave them to cool a bit, then eat with gusto.